
When you are making layer cake,one of the most important skill and step is to stack your cake.
How do you stack your cake?Do you really know how to stack a cake?
Have you ever watched someone else make a cake on TV or in a food video and got excited, followed suit and thought you could do the same?
So stacked cakes, such as wedding cakes, are created when different-sized cakes are placed directly on top of one another. This cake is very different from a normal cake and requires more effort and time on your part.
Stacked cakes and cakes with columns or tiers can be very dramatic and beautiful but, certainly, require a firm foundation and the correct accessories for success.
A multi-tiered cake without the proper foundation is doomed, most likely resulting in ruined decorations, uneven layers, and potentially a completely collapsed confection.
No matter how many cakes you are layering, from 2 up to even 8 tiers, it is best to have at least a 2-inch to a 4-inch difference in the diameter of each tier to create the best look.
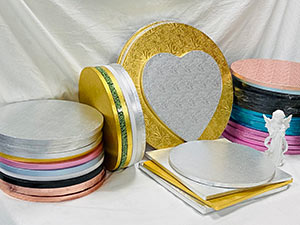
Therefore, you should pay attention to the size and height of each layer, and even you should take into account the weight of each layer so that you can choose the right material,such as cake board and cake boxes.
Stabilizing the Stacks
Stacked cakes, especially very tall ones, must be stabilized to avoid tipping, sliding, or even caving in. One way to secure the cake is to use individual cake boards and dowels in each tier. This makes it easier to transport the cake from the kitchen to the celebration—the tiers can be kept separate for transport and then assembled at the venue location to lower the risk of unsightly accidents.
To avoid cracking the icing, tiers should be stacked while the icing is freshly done. Alternatively, you can wait for at least 2 days after icing the tiers before stacking.
The only time full dowelling is not necessary for a stacked construction is if the lower tiers are a firm fruit cake or carrot cake. If a light sponge cake or mousse-filled creation, without the dowels the top tiers would simply sink into the lower ones and the cake will topple over.
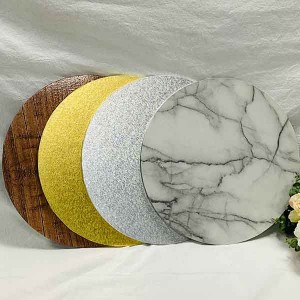
Using the Cake Boards
Utilizing cake boards in a stacked cake not only assists in stabilizing but also makes it much easier to place each tier onto the cake.
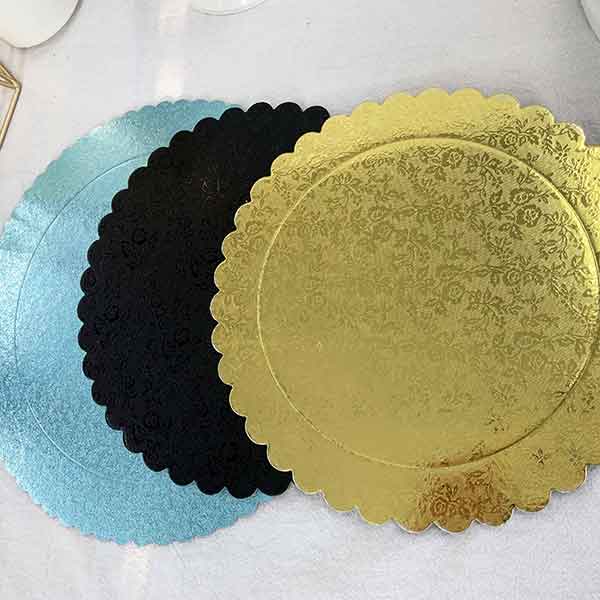
Purchase or cut the cake boards so they are the same size as the cake layer (or else the board will show). It is also important to make sure the material of the board is sturdy and won't bend easily.
Following is a few simple pointers to teach you how to stack a layer cake.
This is not some super advanced tutorial. This is a quick guide for eager beginners or anyone wanting to polish the skills they already have under their belt.
What Is A Layer Cake?
This feels like a silly question to answer, but let’s be plain as day. A layer cake is any kind of cake with stacked layers! On it’s most basic level, cake is a single layer with frosting, glaze, or some other garnish on it’s top, but a layer cake typically consist of 2 or more layers.
What Do I Need to Make a Layer Cake?
For starters, you’ll need the following:
Cake Layers (or a single thick layer of cake that you plan to slice in half)
Frosting
Filling (if desired)
Serrated Knife
Offset Spatula
If you’re ready to go to the next level, here’s a few more items to consider purchasing:
Cake Turntable
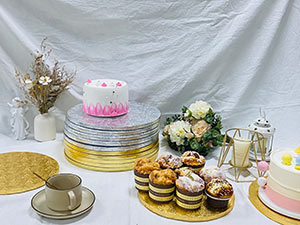
Cake Boards
Piping Set or Freezer-Safe Ziploc Bag
Cake Leveler
All of them can be found in Sunshine!Also we have professional sale manager and they will help you if you need some advise.
So next is follow a few step then you will be very successful!
Step 1: Level Your Cake Layers Once They’ve Completely Cooled
This first step is to level your cake layers! This should be done once the cake layers have fully cooled to room temperature. If they’re still warm, they will crumble and you’ll have a real mess on your hands.
Use a serrated knife to carefully level the top of each cake layer.
This will make your cake so much easier to frost and helps avoid bulging frosting or air bubbles that can get trapped between uneven cake layers.
Step 2: Chill Your Cake Layers
This step might sound odd, but I highly recommend chilling your cake layers in the freezer for about 20 minutes before assembling your cake.
It makes them so much easier to handle and minimizes crumbing.
It also prevents your cake layers from sliding around as you’re frosting them.
The cold cake layers cause the buttercream to stiffen up a bit, which makes your cake more stable once it’s assembled.
If you make your cake layers in advance and freeze them, just take them out of the freezer and unwrap them about 20 minutes before you plan to use them.
Step 3: Stack Your Cake Layers
Then it’s finally time to stack your cake layers! Start by spreading a tablespoon of buttercream on the center of your cake board or cake stand.
This will act like glue and help keep your base cake layer in place as you build this cake.
Next, spread a thick, even layer of buttercream on top of each cake layer with an offset spatula. As you stack your cake layers, make sure they’re aligned and straight.
Step 4: Crumb Coat & Chill
Once your cake layers are stacked, cover your cake in a thin layer of frosting. This is called a crumb coat, and it traps those pesky crumbs to make it easier to get a perfect second layer of frosting.
Start by spreading a thin layer of frosting on the top of the cake with a large offset spatula, then spread additional buttercream around the sides of the cake.
Once the cake layers are fully covered, use your bench scraper to smooth the frosting around the side of the cake. You want to apply a moderate amount of pressure.
Finally, now that you've practiced how to stack a layer cake yourself, can you enjoy decorating your cake!
Related Products

Post time: Aug-27-2022