
One of the most common questions people have when making cakes is: "How on earth do I move the cake from the turntable to the cake stand without damaging the surface?" "How do I move the cake from the cake stand to the cake board? Won't it cause the icing to crack?"
What to say about transferring a cake to a cake board, whether on a rack or in a box, can be totally nerve-racking if you've never done it before. Because after you've spent so much time decorating, the last thing you want to do is screw up all your work before anyone has a chance to see the cake in its most perfect condition! Because everyone's cake boards are super clean and pretty and don't want to spoil the cake on display. To save you the extra stress, today's cake basics are about my method for transferring the cake after it's decorated.

The two most important methods
In short, we have two quick and easy ways to safely move your cake from a turntable or cake board to a cake stand without ruining your buttercream.
The first is to put the bottom bracket directly on the turntable, then apply the surface decoration on the bottom bracket, and finally use a paper towel to support it.
Second, after finishing on the turntable, insert two spatulas into the bottom of the cake and the surface in contact with the turntable, and transfer it to the bottom support steadily and accurately. But a few tips worth noting: Move the cake to the rack as slowly as possible.
Once you have the cake on the rack, gently lower the cake so that one side of the cake lifts up and wraps the cake around where you want it. Then, slide the angled spatula back into the bottom of the cake, gently lower the edges of the cake, and remove the spatula. Complete the entire smooth process to start showing off your perfect cake.
Two things are essential for successful cake transfer: 1) a solid base under the cake and 2) freezing the cake. First, a solid cake board needs to be prepared. This method will not work if the cake does not have a solid foundation under it, as it will be nearly impossible to lift the cake and possibly cause the cake to crack.
How to transfer cake from cooling rack to plate?
Step 1: Cool the cake.
Before you frost the cake, place it on a cake board slightly larger than the cake (found in the Cake Boards category of the Sunshine Baking package).
This piece of cardboard will support the cake when you move it later. Before removing the cake from the larger cake board, to ensure the integrity of the cake, it needs to be cooled first before attempting to move, put it in the refrigerator for 30 minutes or more. This will give the buttercream a nice firm surface and the cake should drop to cool.
This will ensure that the frosting stays intact when moving the cake. When moving the cake, make sure the cake lifter is almost covering the bottom of the cake, but also use extra hands to support the cake. If it's fondant I would leave it overnight before moving it so the fondant is firm and doesn't leave marks, then fondant covered cake.

Step 2: Spatula Heating Method:
Once the cake is nice and cool, heat it under hot water with a spatula for a few seconds, then dry it thoroughly with a towel. Now that the spatula is warm, run it along the bottom edge of the cake to release it from the turntable.
You need to get the spatula as close and parallel to the turntable as possible to get a clean edge on the bottom of the cake. This helps you separate any icing from the stand to create a clean, straight bottom edge; otherwise, the icing may crack and the bottom edge will look uneven.
Step 3: Release the cake from the turntable
Once you have it on the rack, gently lower the cake and keep one of its edges lifted to rotate the cake around where you want it. Then, slide the angled spatula back down and gently lower the edges of the cake before removing the spatula.
Note that my fingers cover the area above the spatula to prevent the surface of the cream from sliding off with the spatula. If your cake has more than one layer, use a spatula to cut each layer separately, then assemble your cake when you arrive at your destination.
Step 4: Move the Cake
A spatula was needed for a little help in order to slide the cake off the cake lift. Lift one side of the cake with a spatula and slide one hand under the cake.
Remove the spatula and place your other hand under the cake and slowly lift it up. Move the cake to the rack, the slower the better.
Lift one side of the cake with a spatula and slide one hand under the cake. Remove the spatula, place your other hand under the cake, and slowly lift it up. Move cake to rack and walk slowly.
Step 5: Repair any areas (if necessary)
Reheat the spatula slightly using the hot water method from step 2 and run it around the bottom edge of the cake to press down on any areas that appear to flare out or imperfect transfers. This helps make the cake look even more flawless!
All my best tips for moving the cake to the stand while keeping it looking perfect.
You can use the same method to move the cake into a box, plate, or wherever the cake needs to be placed.
If you want to learn more about cake baking and decorating, be sure to follow this Sunshine Baking package and all the fun cake product videos I post on my YouTube page. Hit the subscribe button there so you don't miss any new videos.
PS: I've been thinking of new "Sunshine Baking" topics to help you learn, so if you have anything you'd like me to introduce, please leave a comment below!
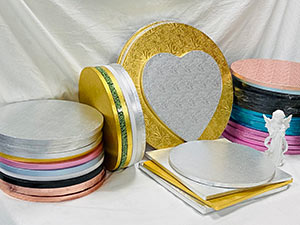
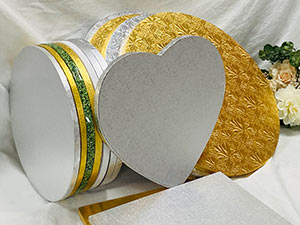
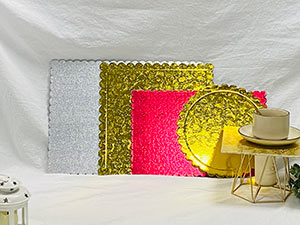
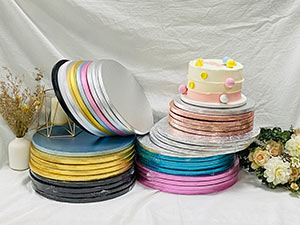
The cake board is the base of the cake, providing a firm base on the bottom of the cake + making it super easy to transfer.
It never gets taken away, you just slide your spatula under the finished (frozen) cake and slide your hand under so you can grab the cardboard cake and transfer the whole thing over. Hope that helps.
When making an 8" cake to fit in a 10 or 12" cake box, do you recommend using a cake board to mount the box or attach the smaller board and cake to the larger board. If the box already has a corrugated cardboard (or other sturdy) bottom, there is no need to put it in another cake board.
If it's fragile then I'd cut a piece of cardboard to strengthen the bottom of the box before placing the cake on top.
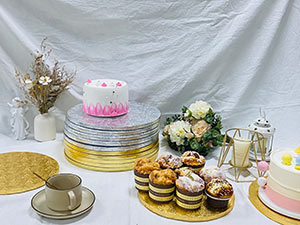
You'll also find tons of cake accessories and tool supplies in the Sunshine Baking Pack to inspire you and broaden your skills - be sure to hit the button to email us so you don't miss anything new!
Related Products
Post time: Mar-26-2022